How to print two colours without an AMS on a Bambu Lab printer
No AMS? A two-colour keychain still prints: one pause, one filament swap. Where to pause, how to swap on an A1, P1 or X1, and what needs an AMS.
6 min read
- Multicolour
- No AMS
- Bambu Lab
- Bambu Studio
- Keychains
- Filament change
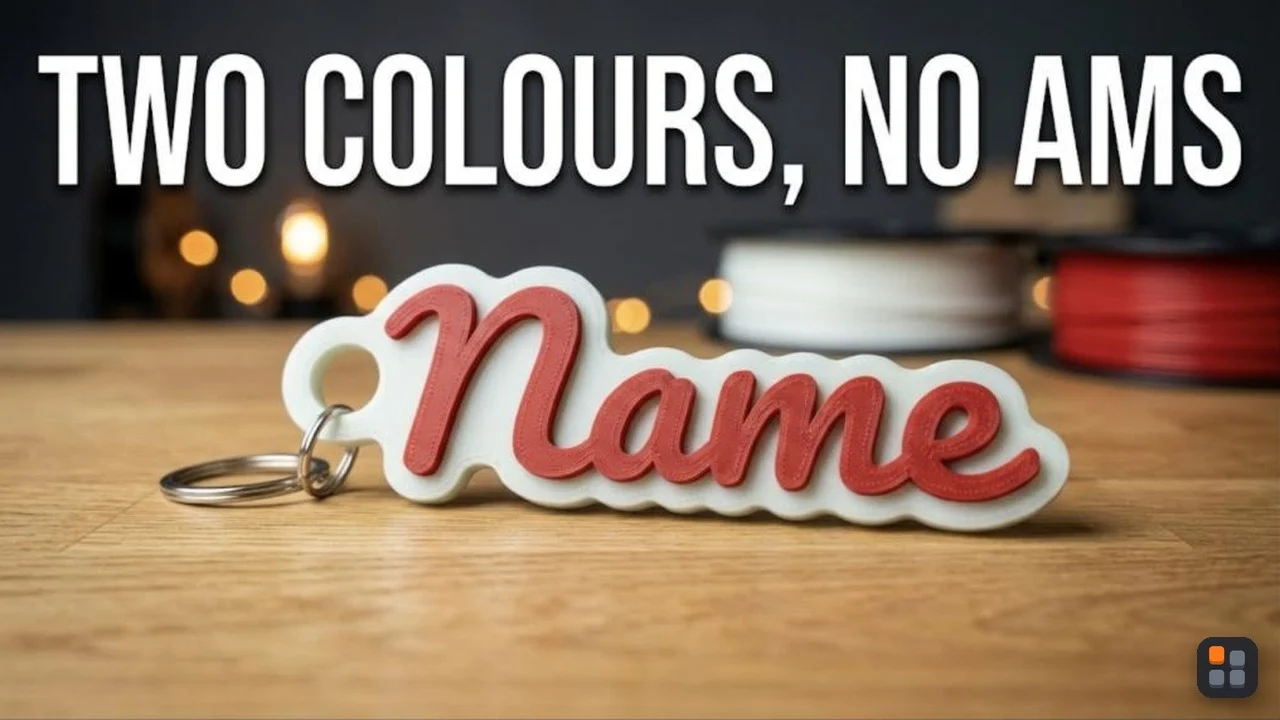
You don't need an AMS to print a keychain in two colours. A printer without one holds a single filament, so you change colour by hand: the print pauses at the layer where the new colour starts, you swap the filament, and it carries on. For a name keychain, a base in one colour and raised letters in another, that is one pause and a couple of minutes at the printer.
The one rule: colours change between layers
Without an AMS the printer can't change filament in the middle of a layer. Every layer prints in one colour, and a change of colour happens on the way up, between two layers. That decides which designs work:
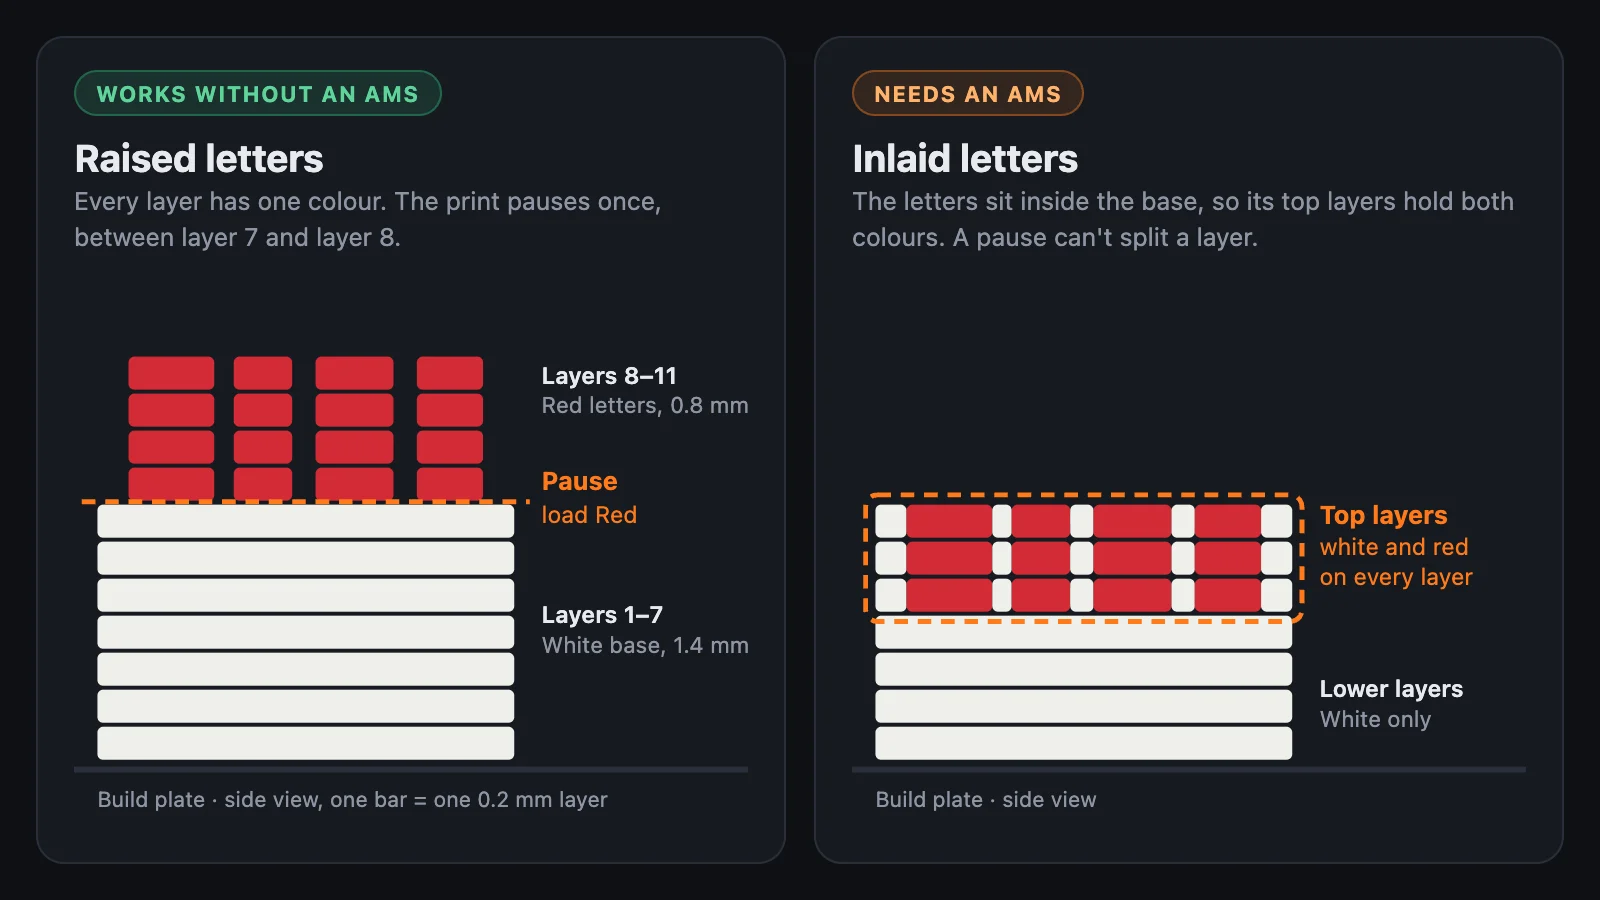
Raised letters on a base: works. The base prints in the first colour, and the letters start one layer higher in the second.
Stacked bands of colour: works, with one pause for each new colour. A white base, a black middle and red letters on top need two pauses.
Letters set flush into the base (an inlay): needs an AMS. The letters and the base share the same layers, so every one of those layers would need both colours.
Two colours side by side on the same layers, such as a QR code inlaid into the back: needs an AMS, for the same reason.
What you need
A Bambu Lab printer printing from its external spool.
Two spools of the same kind of filament, for example two colours of PLA Basic, so both print at the same settings.
Bambu Studio, to set the pause.
Step 1: put a pause where the second colour starts
If the file already has the pause
Some 3MF projects come with the pause set: MakerWorld profiles labelled "No AMS" often do, and so do the files from our Keychain Maker when you choose No AMS (more on that below). Open the project, slice it as usual and print. There is nothing to add.
Adding the pause yourself
Load the model and put every part on the same filament, filament 1. With a second filament in the project, the slicer plans swaps that only an AMS can make.
Slice the plate and open the Preview.
Drag the layer slider on the right up to the first layer of the second colour: the first layer where the letters appear.
Right-click the + on the slider handle and choose Add Pause.
Slice again. The pause is now marked on that layer.
Why not "Add color change"?
Bambu Studio also offers a colour change on the layer slider, but that is a filament change for an AMS to make. When we sliced test files with Bambu Studio, a colour change entry produced no stop in the G-code, while a pause did. Use the pause.
Step 2: swap the filament when the printer stops
The printer finishes the last layer of the first colour and waits. The steps on its screen depend on the model. These follow Bambu Lab's own guides; the menus can move a little between firmware versions.
A1 and A1 mini
Tap Unload. The printer heats the nozzle and cuts the filament.
Pull the old filament out of the tube and wind it back onto its spool.
Push the new filament into the tube until it stops at the toolhead.
Tap Filament, then Load. When the nozzle reaches 250 °C, push the filament in again by hand.
Watch the nozzle. Once the new colour comes out clean, tap Done, then resume the print.
X1 series
Open the settings on the screen and tap Unload. The printer heats the nozzle and cuts the filament.
Pull the old filament out and wind it back onto its spool, so it doesn't tangle.
Cut the end of the new filament at an angle and push it into the tube until it reaches the extruder.
With the nozzle at printing temperature (about 200 °C for PLA), press Extrude until the new colour comes out clean, then resume the print.
Other models
On the P1 series and the P2S the idea is the same: unload, feed in the new filament, purge until the colour is clean, resume. Your printer's manual on Bambu Lab's wiki shows the exact menus.
Before you press resume
Purge until the colour is clean. The first few millimetres of new filament still carry the old colour. Resume too early and the first layer of letters comes out streaked: pink, when red follows white.
Take the purged strand off the nozzle with tweezers, not your fingers, so it isn't dragged across the print.
Leave the print and the plate where they are. The printer carries on from exactly where it stopped.
Picking colours that read
Contrast matters more than colour. A light base with dark letters, or the other way round, reads at keychain size. Two similar shades don't.
Give the letters some height. On our default keychain the base is 1.4 mm thick and the letters stand another 0.8 mm on top, enough to catch light and shadow.
The shortcut: a keychain file with the pause already in it
Our Keychain Maker does the setup for you. Type the name, pick the two colours, and under Export choose No AMS. The 3MF you download has a single filament and the pause already at the right layer, and the print estimate tells you what to do. For the default design it says: start with Jade White, the print pauses once, at 1.4 mm (layer 8), to load Red.
It also keeps your design inside the rule above. With No AMS chosen, letters set into the base are printed raised instead, and nothing goes on the back of a pet tag. The Flexi Keychain Maker and the Cable Tag Maker offer the same No AMS choice.
Quick answers
How many pauses do I need?
One for each new colour. Two colours need one pause; three stacked colours need two.
Does a pause make the print longer?
Only by the time you take to swap. The printer simply waits for you.
Can I do this with an STL?
Yes. Load the parts, put them all on filament 1 and add the pause yourself as in Step 1. A 3MF keeps the parts, colours and pauses together, which is why it is the easier file for multicolour prints: see STL vs 3MF.